This is the workflow that I follow when I’ve been imaging with by OSC dual band filter.
Overview
In a nutshell, I’m going to run Siril narrowband stacking process via Sirilic. This will output two stacked images, one for Ha and one for OIII. I’m then going to do noise reduction in Siril and merge them with Siril pixelmath. I’ll then plate solve the image and do an SPCC colour correction using Siril alpha build. After that, I’ll crop to remove dithering artifacts and then use Siril or Graxpert to fix any background gradients. Then I’ll separate the stars from the background using Siril Starnet integration. I’ll carefully stretch the background using Generalised Hyperbolic Stretch Transformations until it looks good. I’ll save this image as by background.tif. I’ll then load the star mask and stretch this using Histogram Transformations. I’ll save this as stars.tif. I’ll then load this into an old piece of software called ImagesPlus which is mostly obsolete but has a very good star reduction function. I’ll use this to reduce the stars slightly. The next step is to load each tif into Gimp as two layers. I’ll set the star layer as “screen” blend mode and place it abover the background layer. I can now tweak curves, intensity, hue, saturation, etc to suit. After this is done, I’ll save as tif, load back into Siril and use this for and final tweaks and save to png.
Stacking your subs with Sirilic and Siril
Stack with Sirilic
Sirilic is the official Siril Companion. It’s designed to make it easier to stack your data where you may have multiple sessions or multiple different sub lengths. Deep Space Astro did a fantastic intro to Sirilic that’s well worth the watch
To use this effectively, there’s few settings to consider :-
When adding your session, choose “color” and “Duo Ha/Oiii”. If you mistakenly add it as Mono or RGB, you can just choose “Modify light” from the menu to change it.
On the Files tab
- Image box should contain your light frames. Make sure these are the same sub length. If you took more than one sub length in the same session, define it as two sessions in Sirilic
- Biases should contain your bias subs. You only need these if you also have flats
- Dark should contain your dark subs. Make sure they’re the same length as your image subs
- Flat should contain your flats. See note below about the FLAT tab
On the Properties tab
- tick cosmetic correction.
- stack should be “mean”
- Rejection type should be Winsorized or Sigma
- Weighting should be “noise” or “none” for best SNR
- On the FLAT tab underneath Properties, make sure to tick “Biases Subtract”
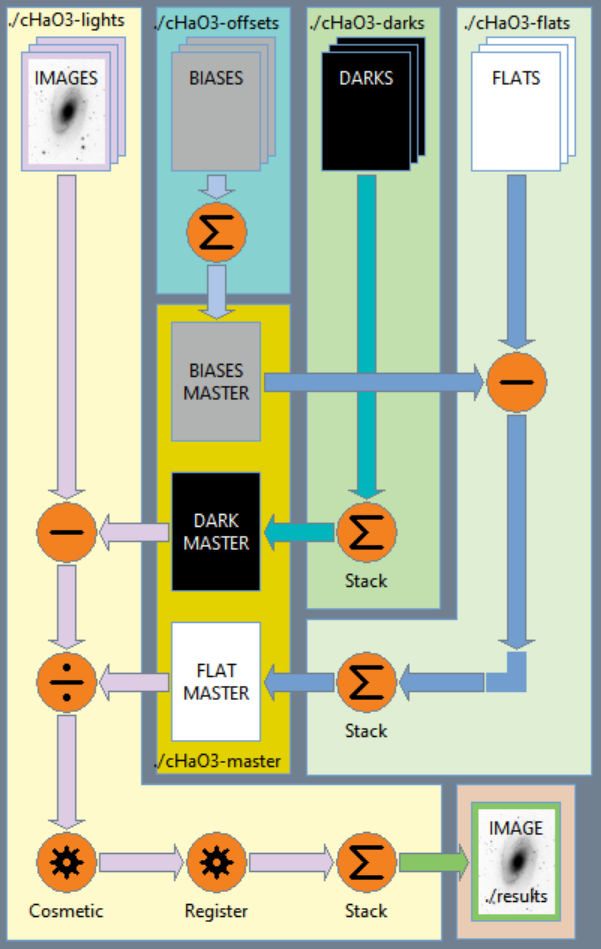
The diagram on your “Process” tab should look like this:-
Prepare your stacked frames in Siril
After Sirilic has completed, it will run Siril and loaded one of either the Ha or OIII stacked frame. This will show as a mono image. Now you’ll want to do the following:-
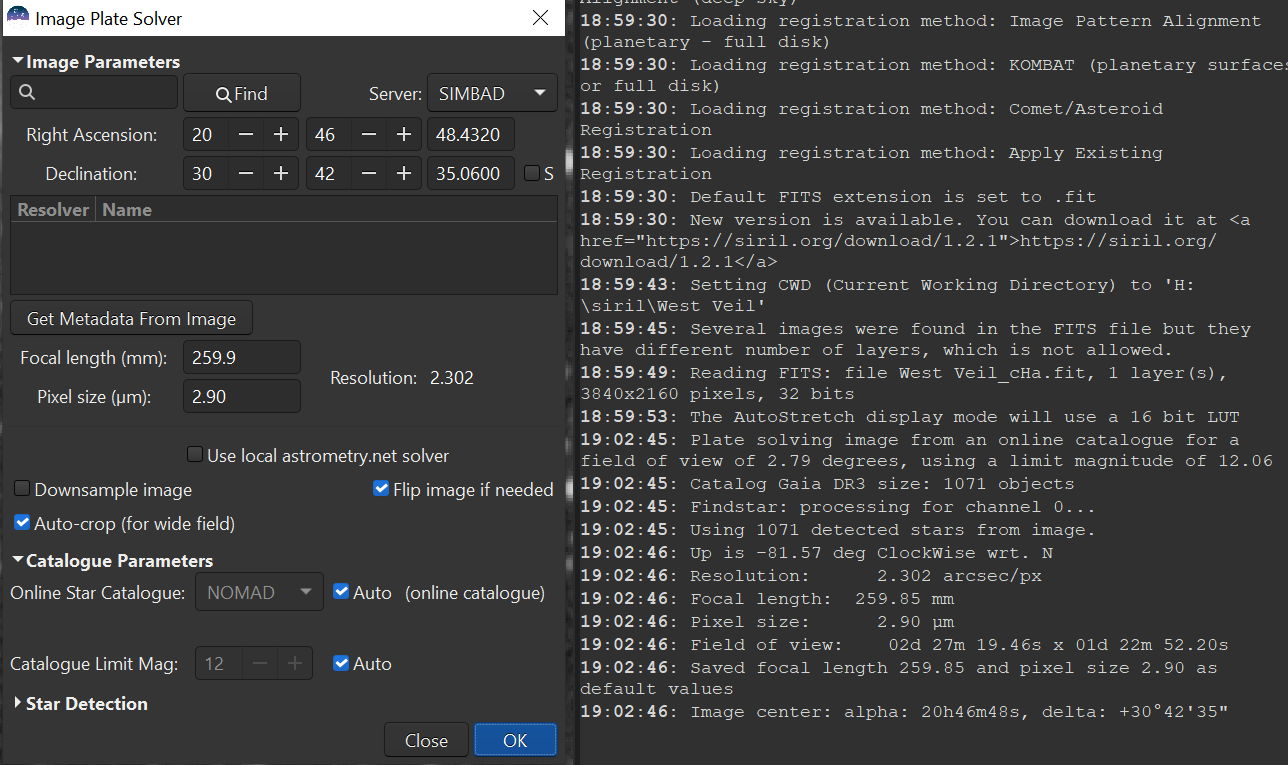
Plate Solve
Change to autostretch mode in Siril so you can actually see it. Load the plate solver by either accessing it in the burger menu to the top right, or by pressing crtl + shift + a. At this point you can probably just click “OK” without entering anything to plate solve it. This will fix rotation & set the coordinates of your image. Once this is done click Close
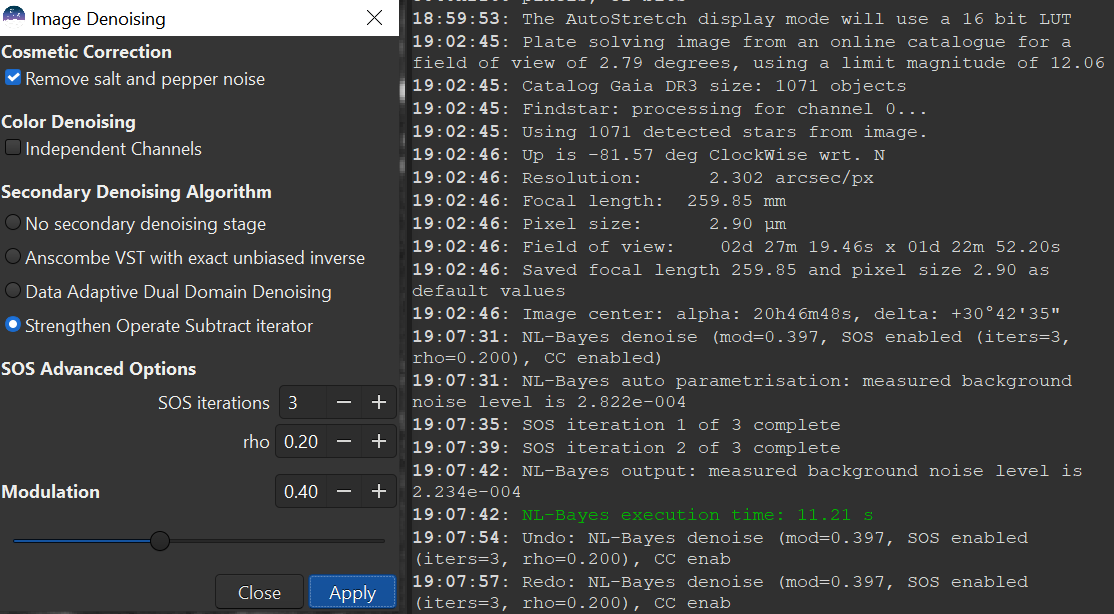
Noise Reduction
Go to Image Processing and choose noise reduction. When the dialog loads, choose “Strengthen Operate Subtract iterator” and slide the modulation down to 40. Do not leave it at 100 or it will look terrible. Once done hit apply.
Now save as a new file, perhaps name it “ha-nr.fit” or similar. Load the other file depending on whether you’re currently editing oiii or ha and repeat
Recombine Ha and OIII
You should now have saved 2 fit files for Ha and OIII with plate solving and noise reduction
Now load “Image Processing”, “Pixel Math”. When the dialog opens, hit the plus button to load the two fits files that you’ve just saved. You’ll see them in the “Images” box below. Hopefully they should already be named as “OIII” and “Ha”, if not you can rename them by double clicking the variable name and typing something new followed by enter. Now untick the “Use single RGB/K expression” and enter “Ha” in the R box, “(0.9 * OIII + 0.1 * Ha)” in the G box and “OIII” in the B box as shown on the screenshot below. Now hit “Apply”.
![]()
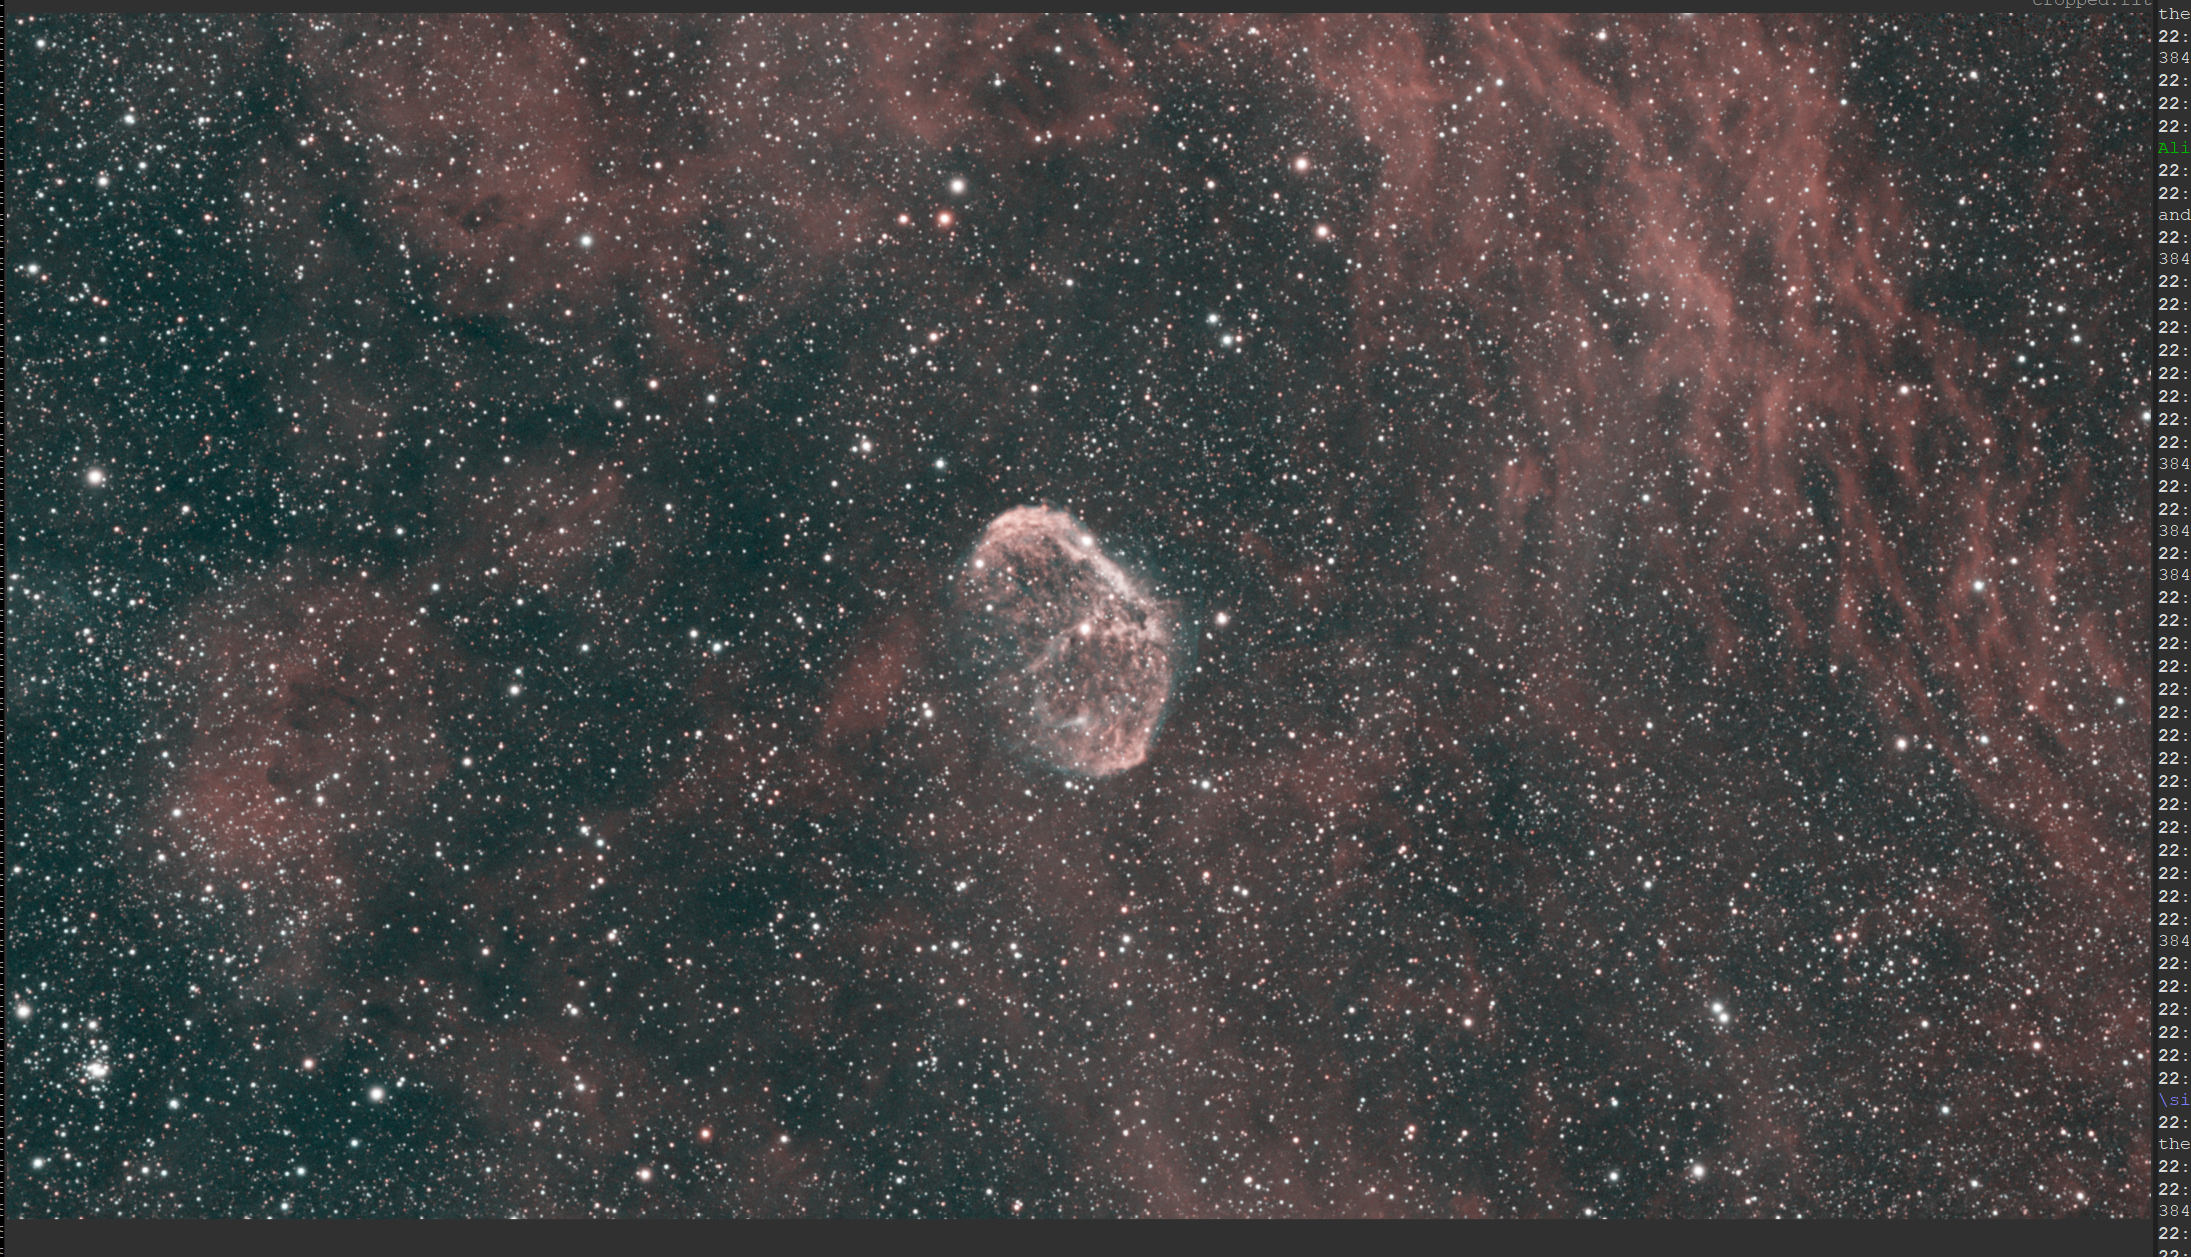
Now you should see a colour image. The colours might not look great yet but we shouldn’t worry about that yet. The next step is to click and drag to stretch a box around the good area of the screen so we can crop out the drizzling artifacts. I personally like to right-click and choose Selection/16:9 so I can keep the correct aspect ratio when I do this. Once you’ve stretched the box, right click and choose crop Save your image. Let’s call it “cropped.fit”
Gradient Removal
Now we should remove any gradient. There are two ways to do this, either using Siril built in background extraction or using an external program called Graxpert. I’ll show the built-in option here but it’s ok to use Graxpert instead.
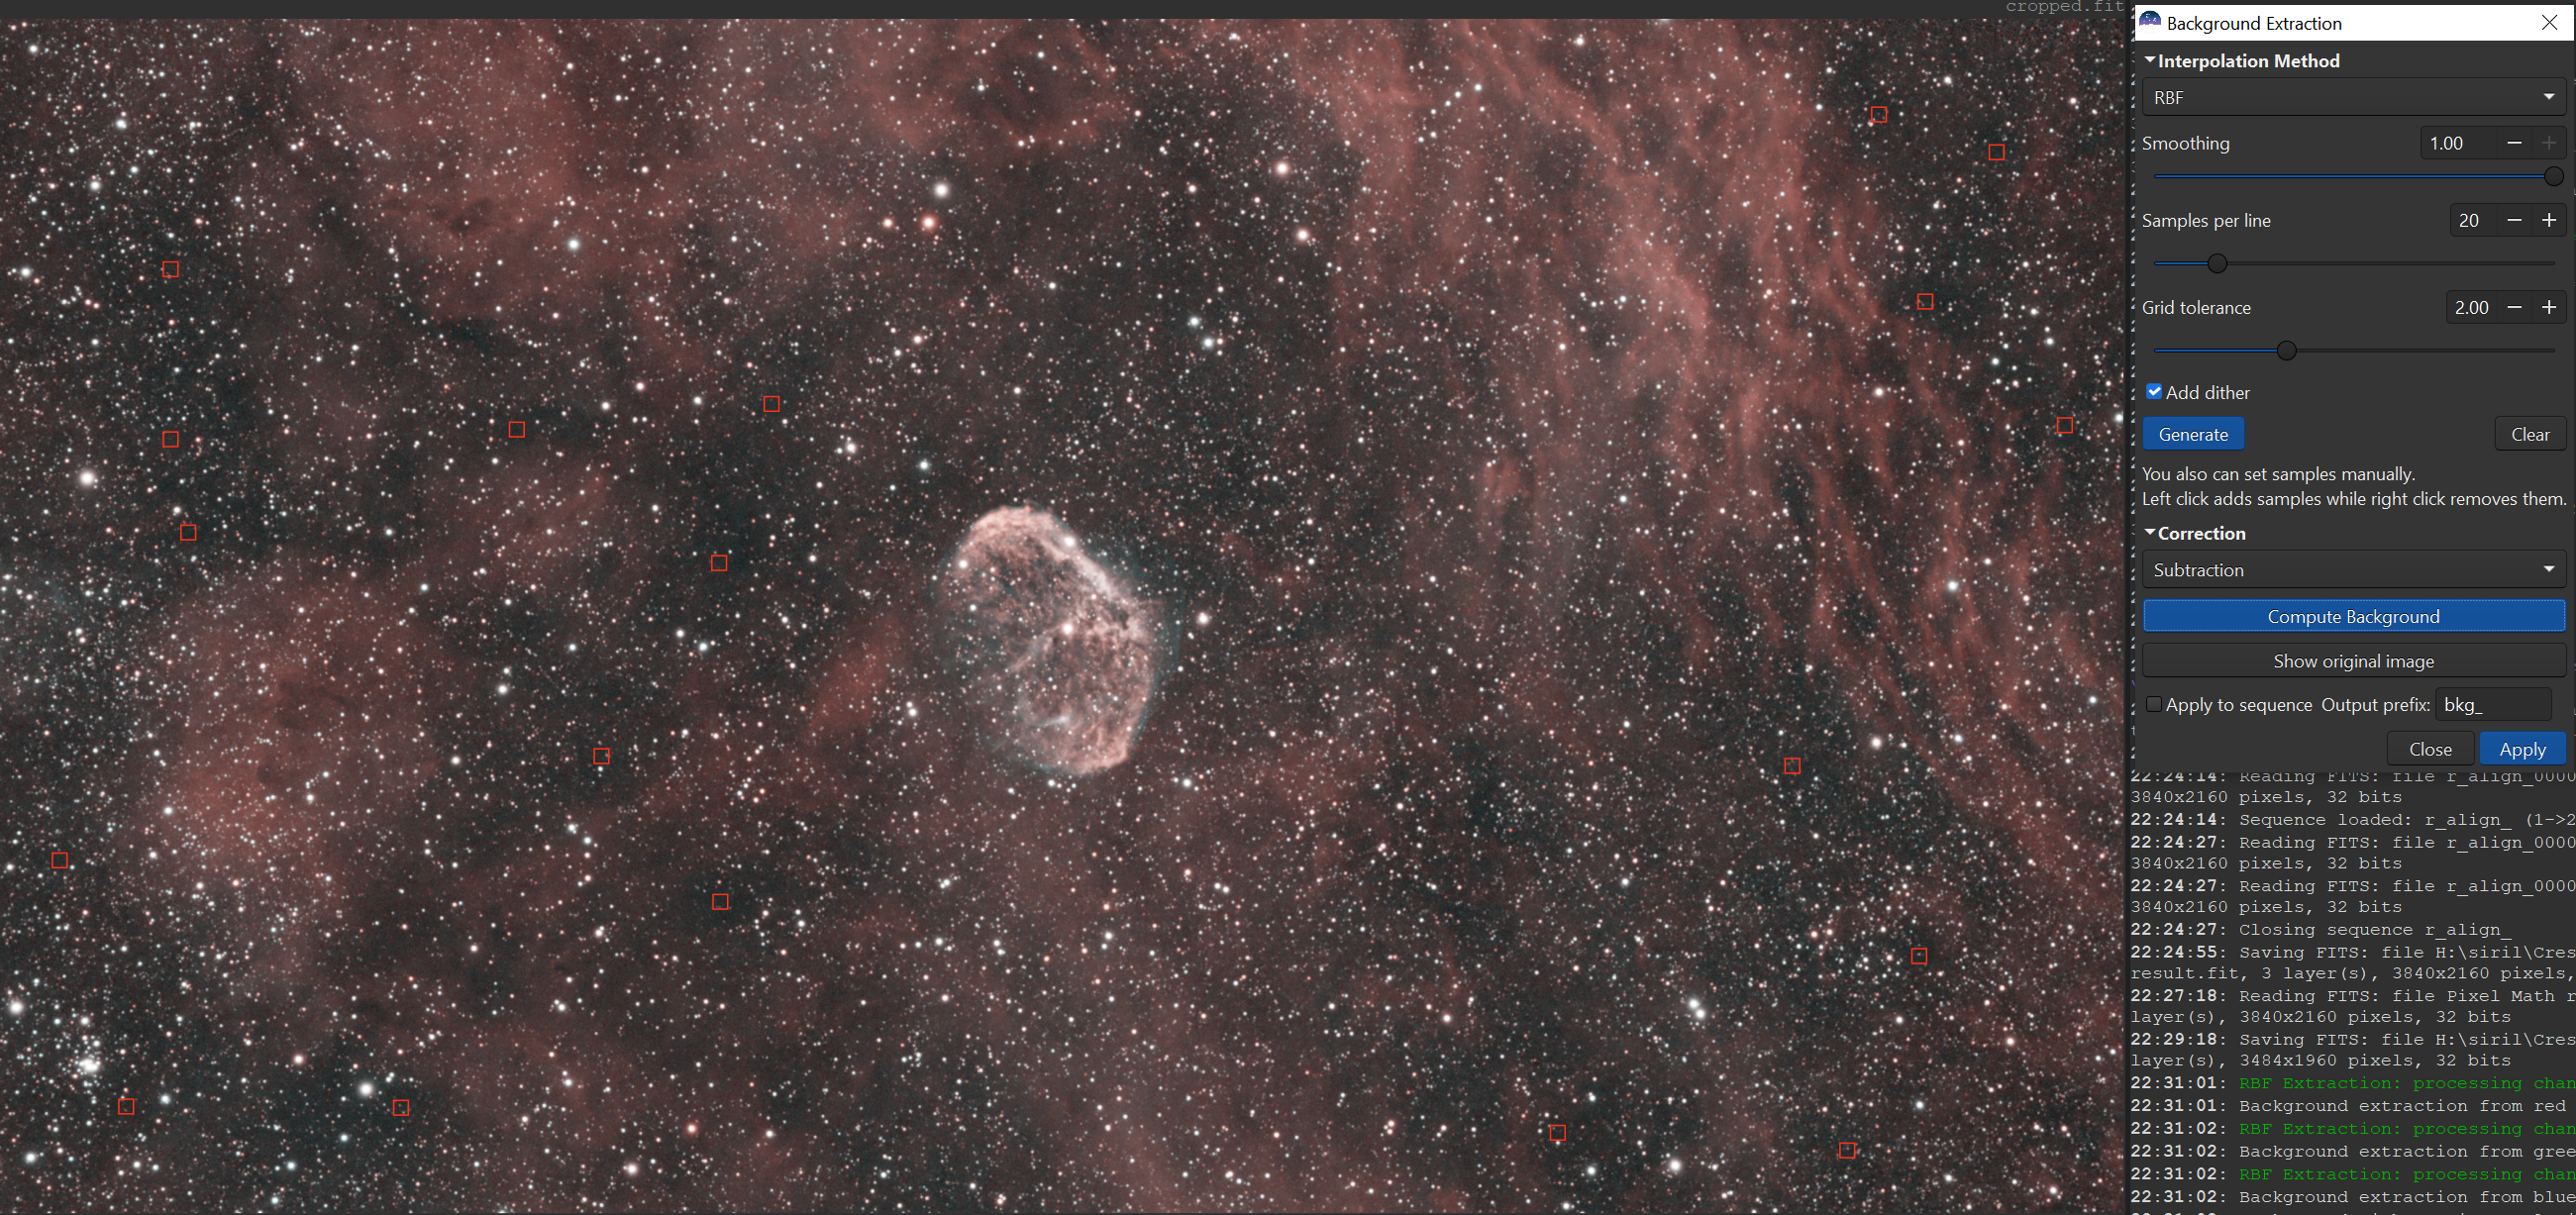
Load Image Processing / Background Extraction. Once the dialog is open, change to RBF mode, and move the smoothing slider all the way to 1.00. Now click “add dither” and place some spots on your image either manually or by hitting the “generate” button. You want spots on an area of the image that’s empty space and not nebula. Once done remember to hit “Apply”. It’s probably a good idea to save your image again at this point
TODO: Add colour correction!
Star Removal
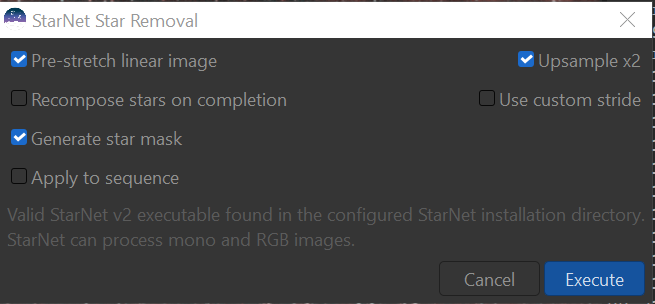
Now we’re going to run Starnet to remove the stars from our image. To do this, go to “Star Processing” and choose “Desaturate Stars” as a preliminary step. Once you’ve done this, go back to the “Star Processing” menu and choose StarNet Star Removal. Once the dialog opens, choose “Pre-stretch linear image” and “Upsample x2”. Hit execute and wait.
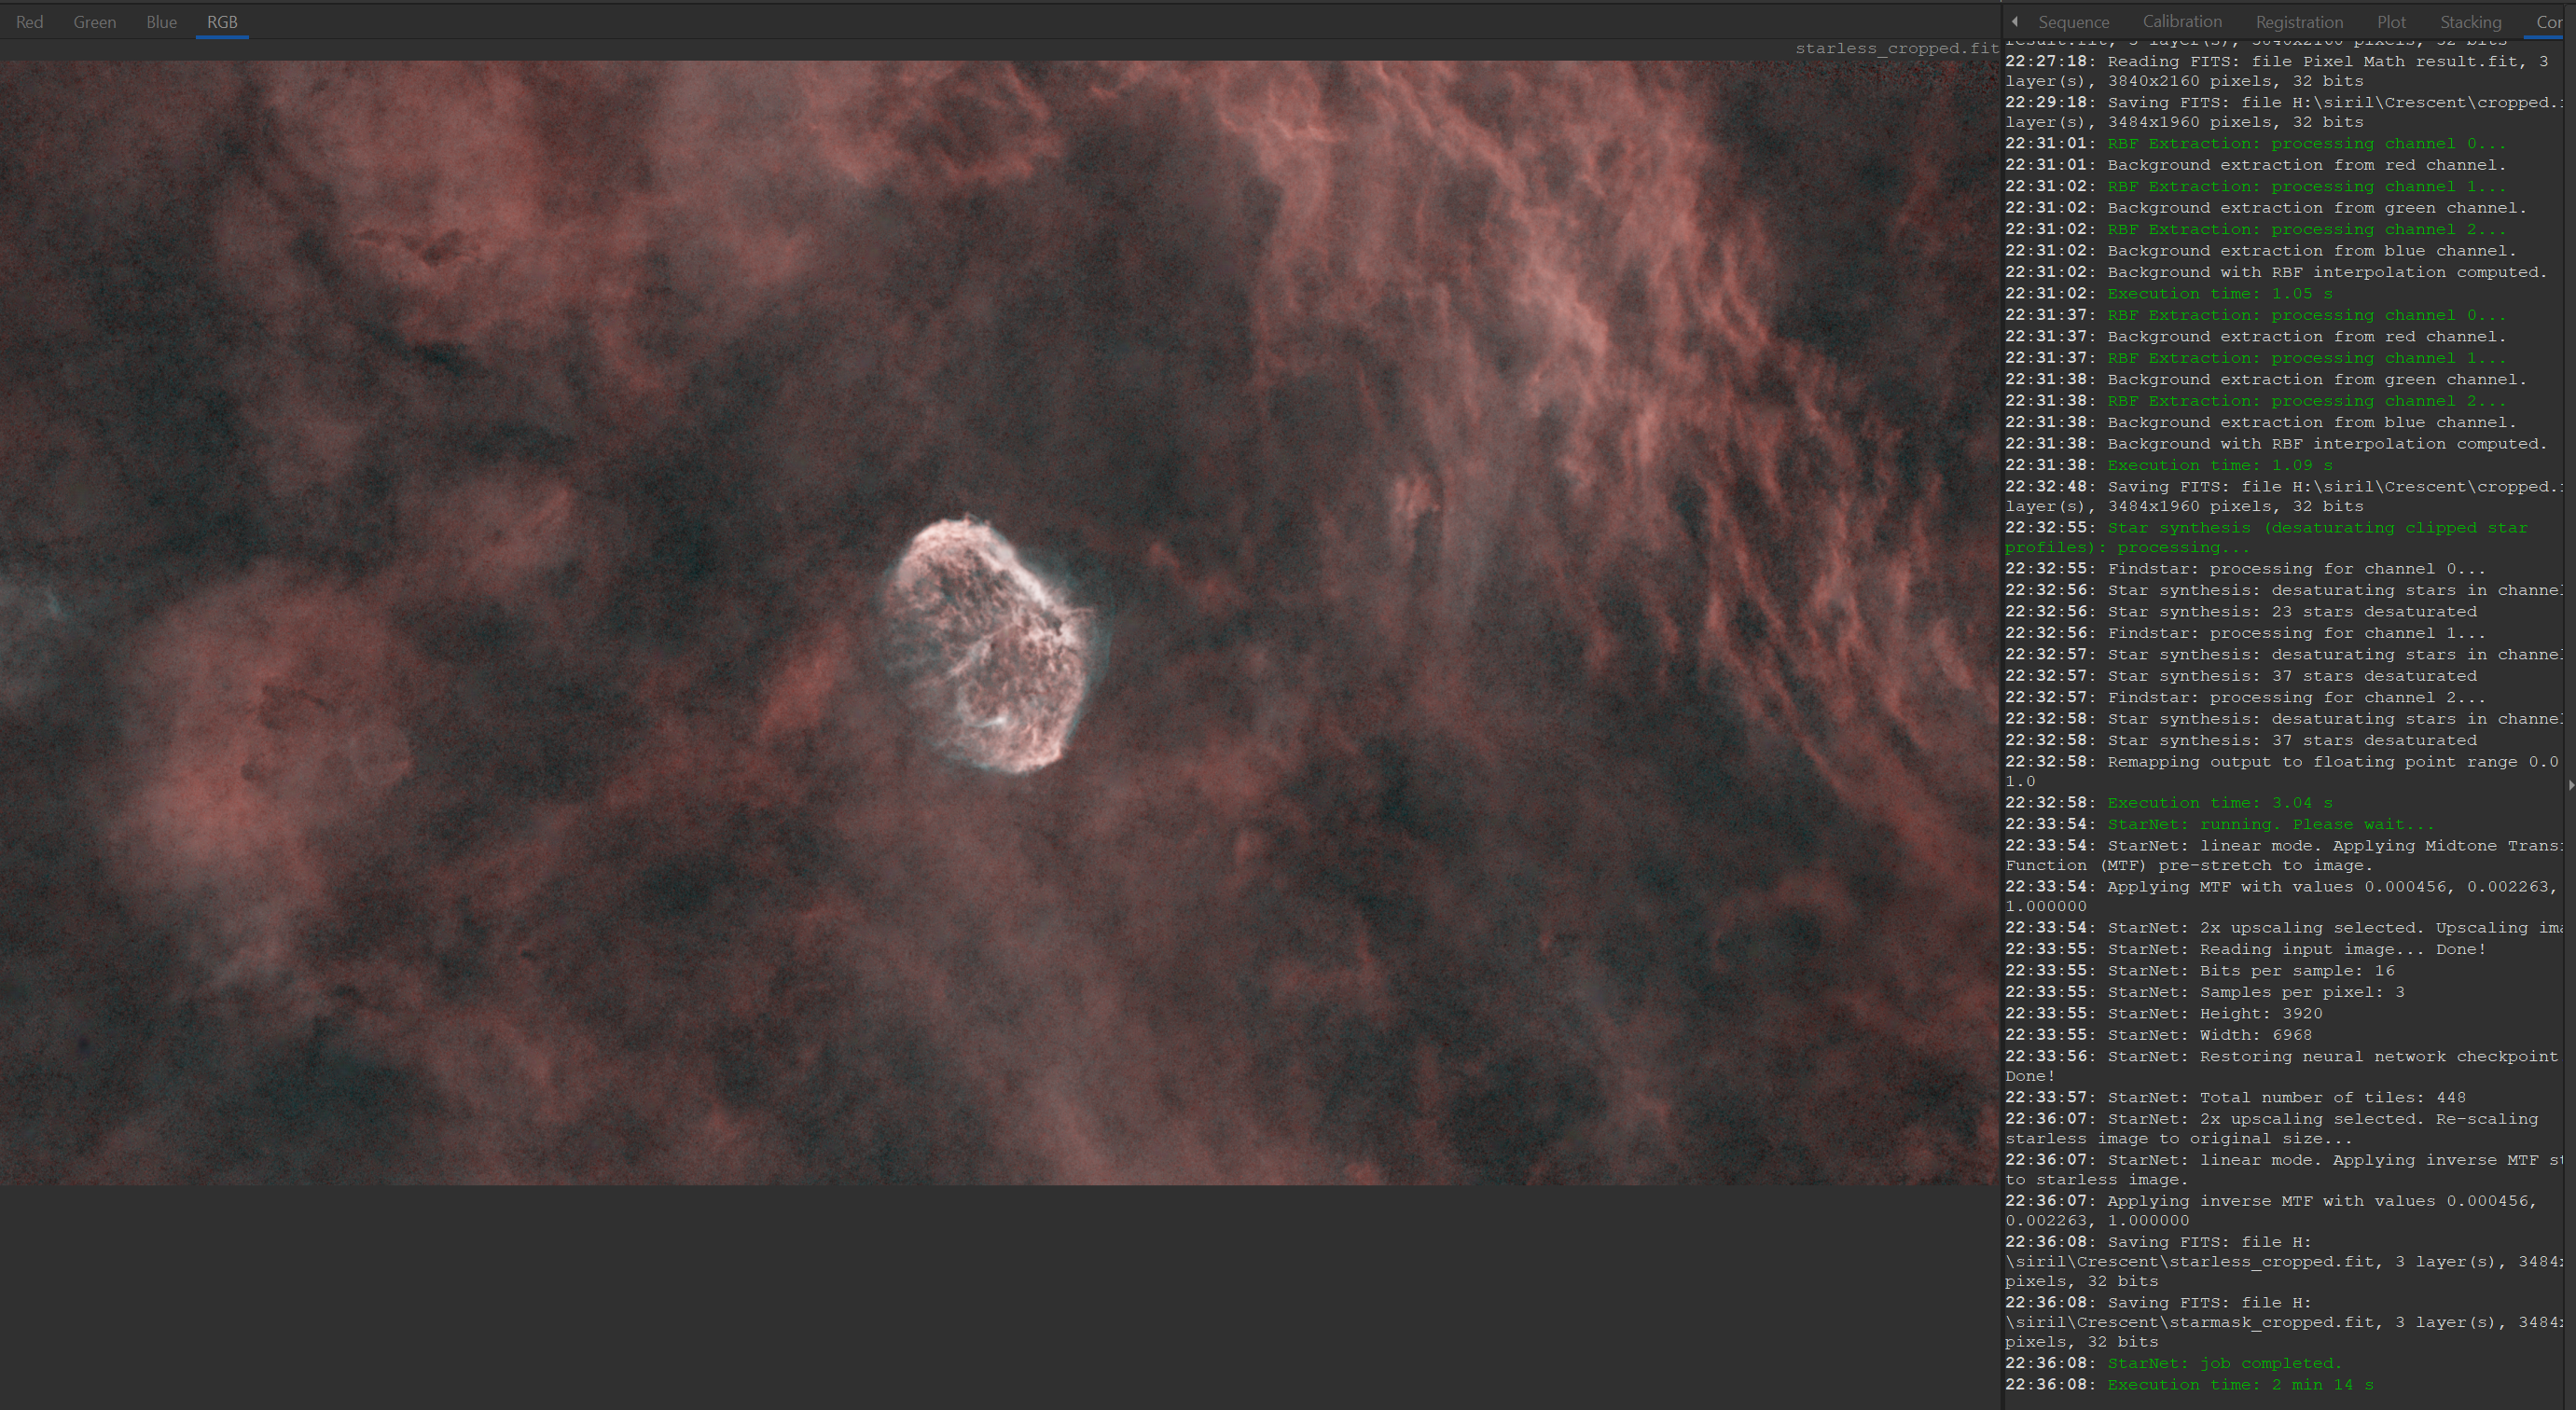
You should now have a starless image
Stretching The Background
You can now change preview mode back to linear and we can start stretching. Go to “Image Processing” and choose “Generalized Hyperbolic Stretch Transformations”. Once again Deep Space Astro gives a great tutorial on this.
The key thing to remember here is that you shouldn’t stretch too far so that you introduce noise. Don’t let the curve clip at the top when you’re stretching. You may have to reduce the “highlight protection” slider if your bright areas get too bright. Don’t keep the blacks too black. Empty space is a dark grey colour, and nebula is red or blue hues.
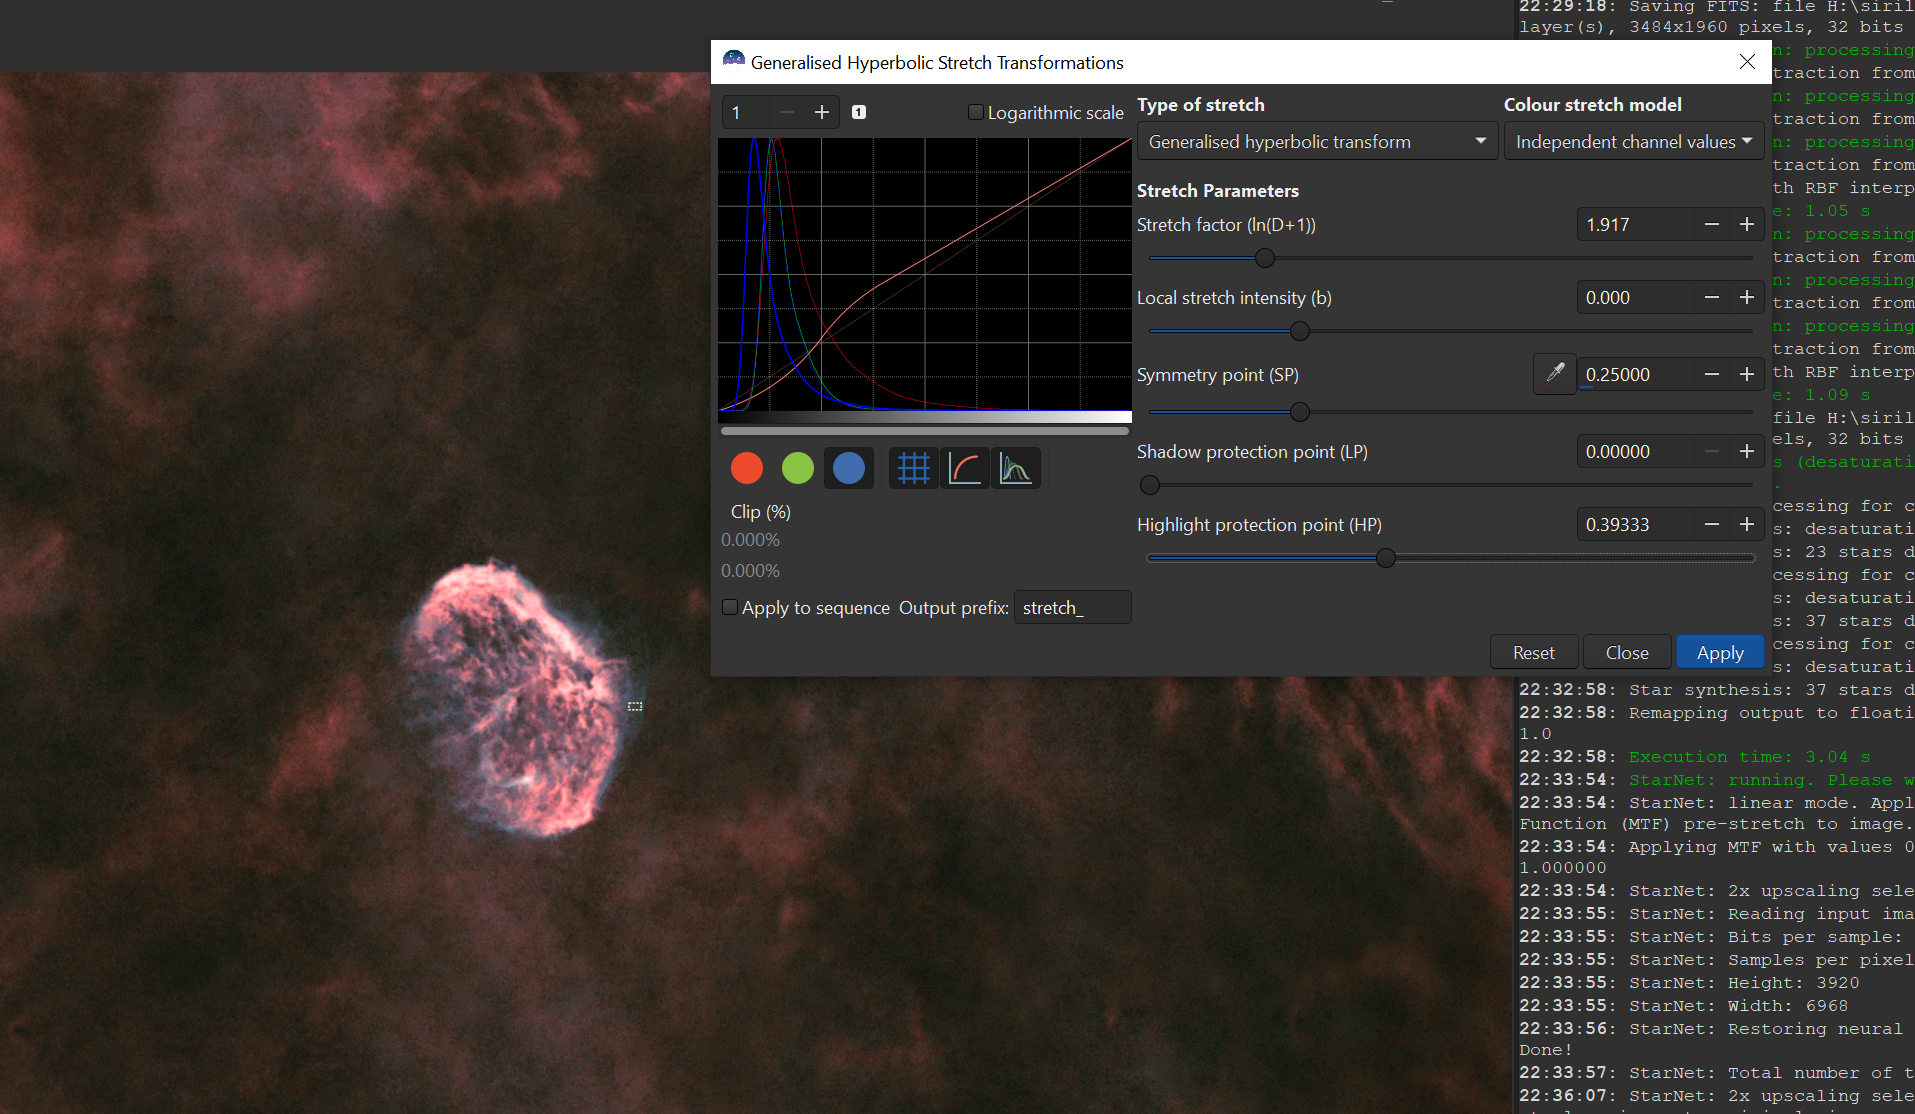
This is the area where you can spend literally hours fiddling with sliders until you get the best out of your data. See screenshot below for a half-way through stretch. Note that I didn’t spend too long on this for the screenshots.
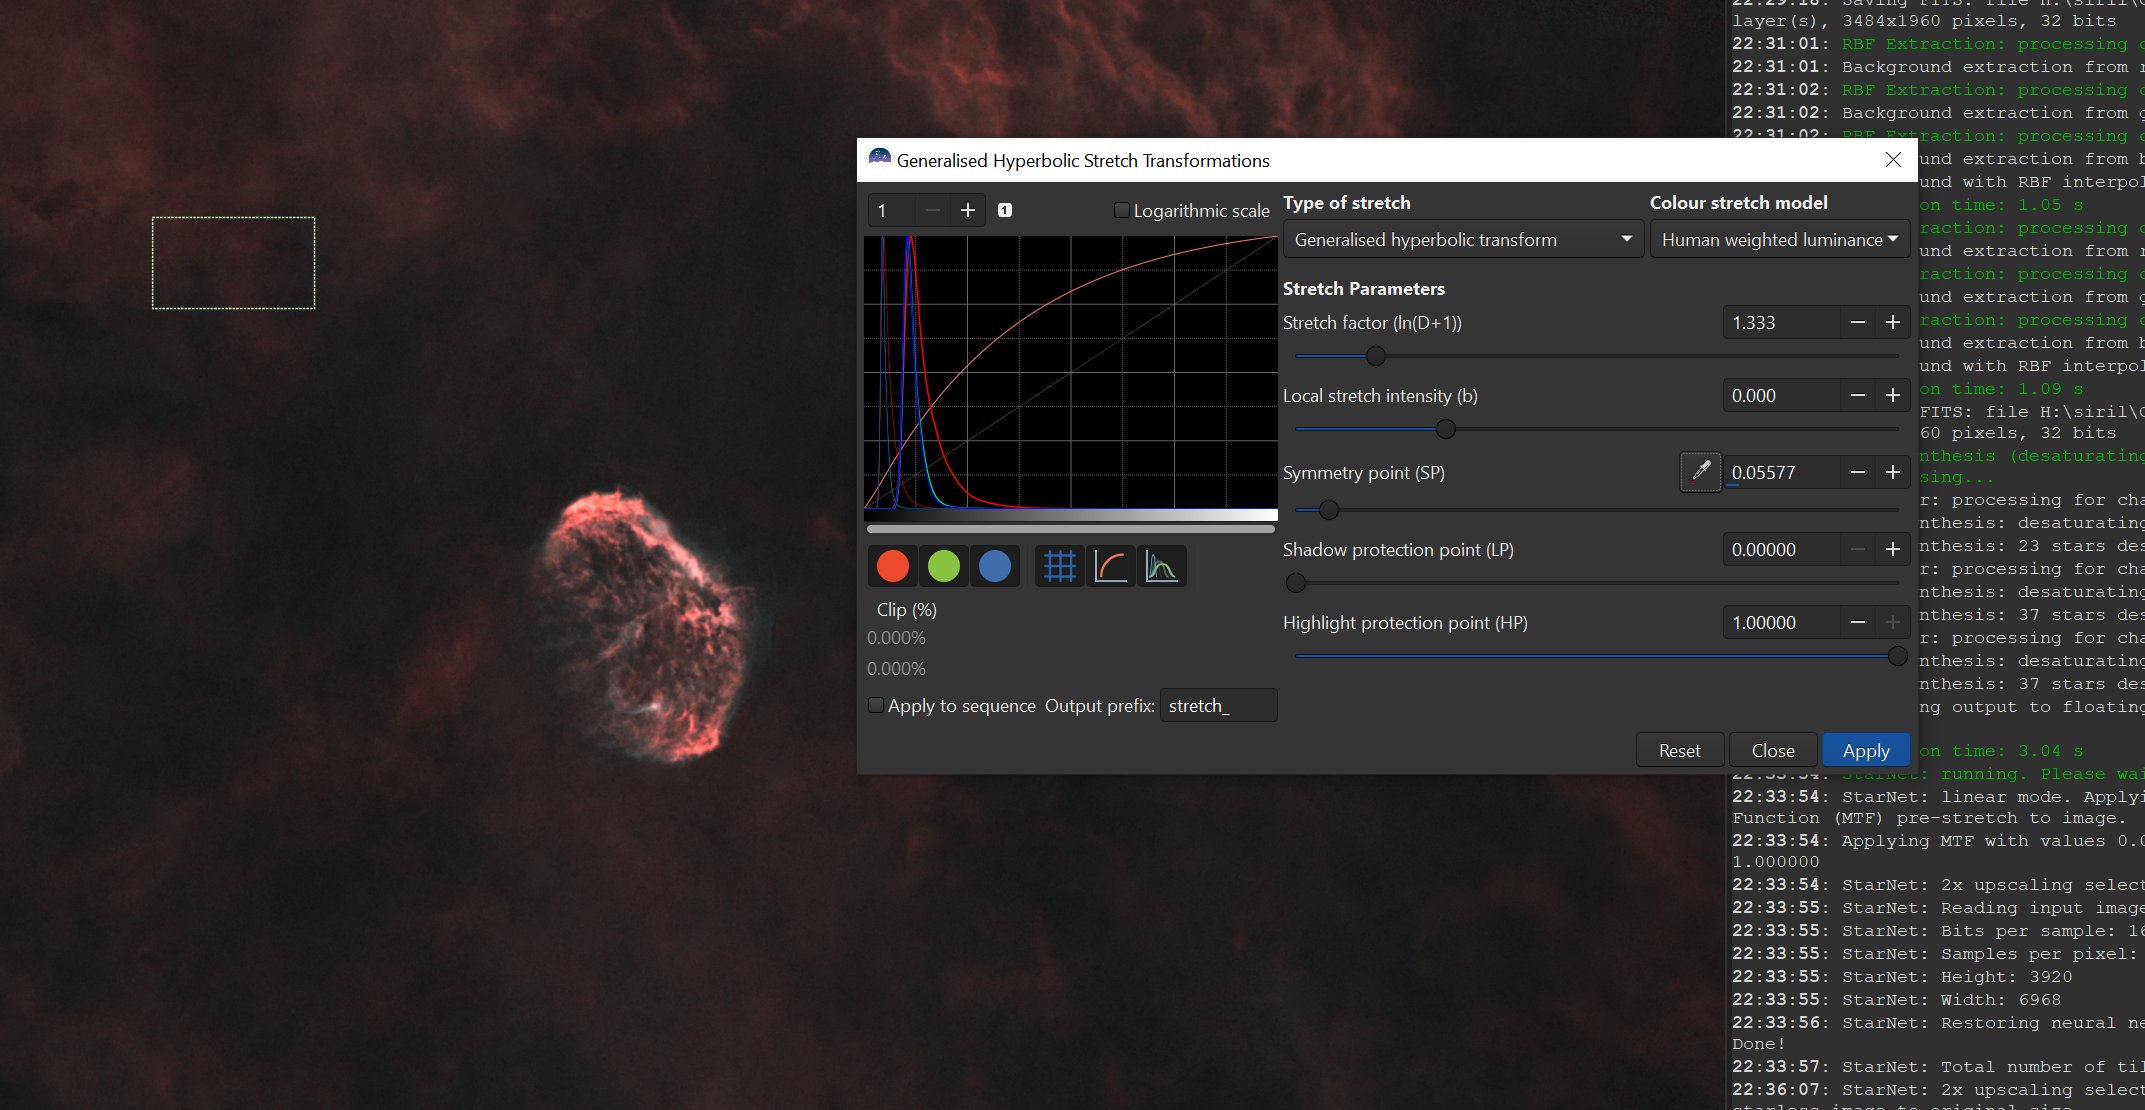
You can also target a particular part of the image. Here I’m boosting the blue channel by setting the symmetry point to the level of the blue around the nebula and limiting its effect by reducing the highlight protection. Targetted stretch like this can be a very powerful tool
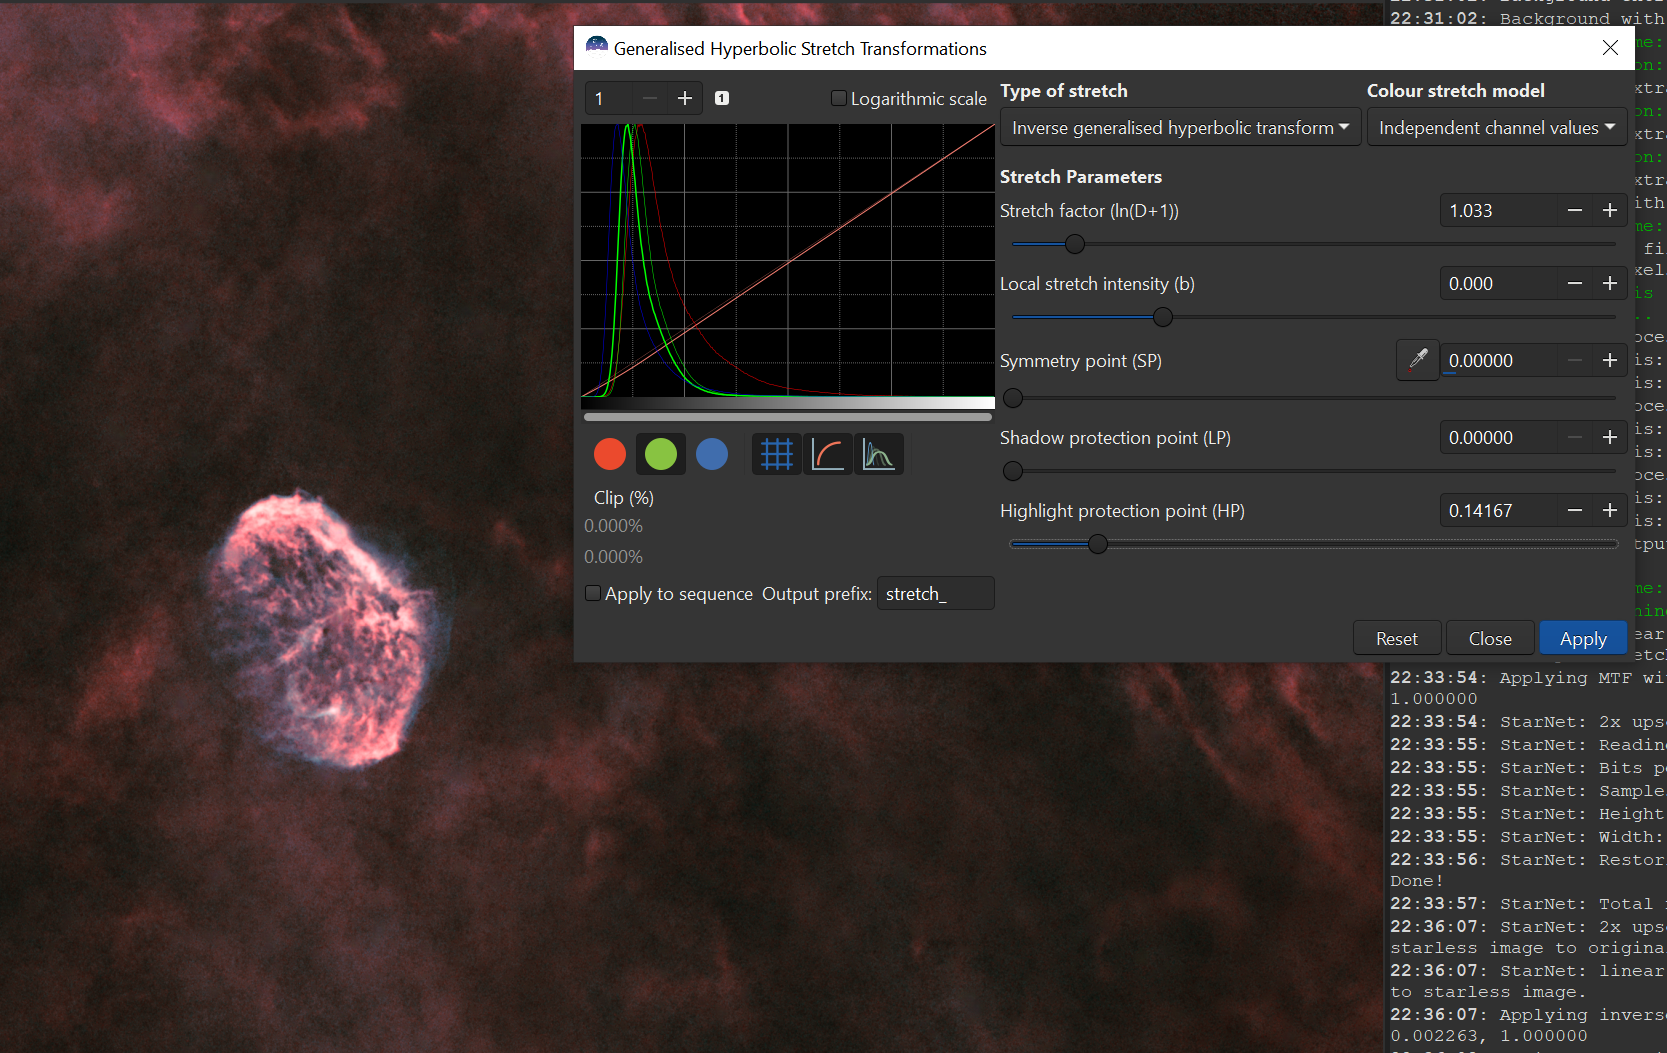
I use an inverse targetted stretch to reduce green noise in the dark areas. I turn off the red and blue channels then do an inverse GHS stretch and protect highlights to target the dark areas. This lets you reduce green noise without turning your cyan OIII colours too blue. See screenshot below
Remember too, you can also stretch the saturation at this stage. You can use the slides to target the part of the image that you want to saturation.
Now that you have your background stretched, save it as “background.tif” or something like that. Note, I’ve saved as TIF not FIT. This is so I can load into Gimp.
Stretching The Stars
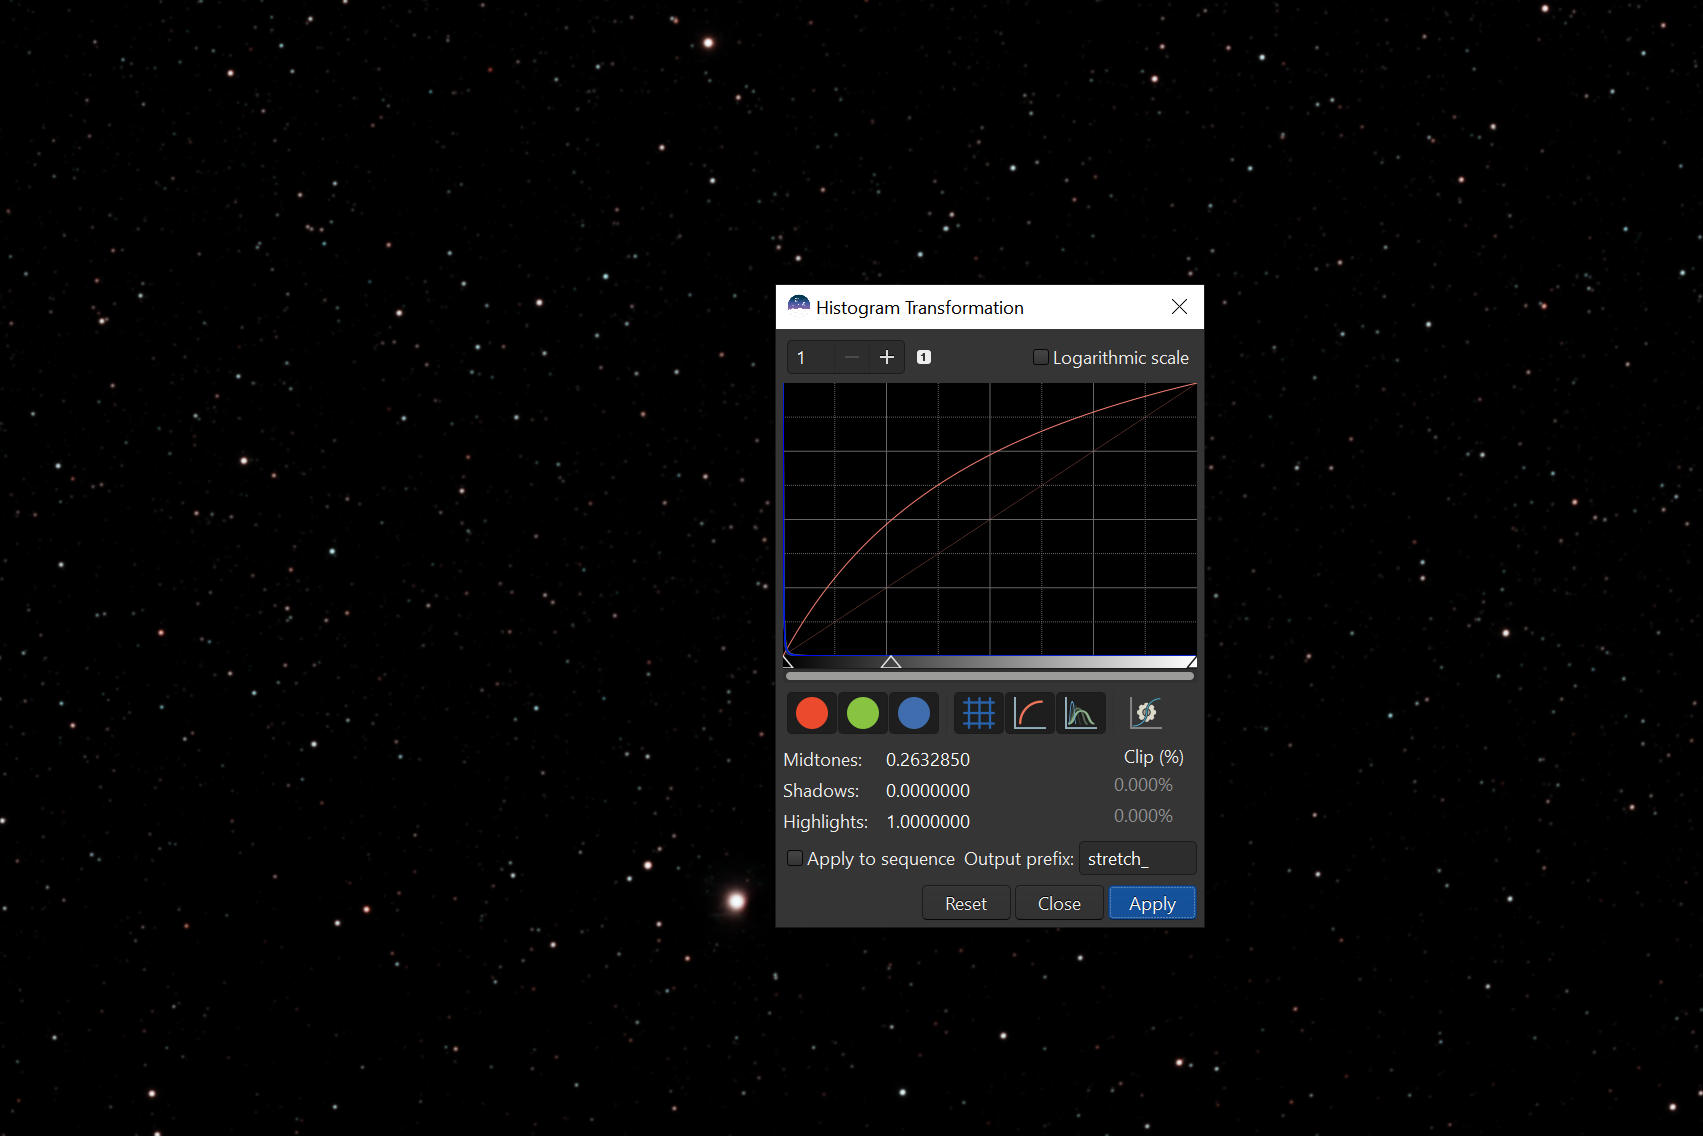
Next step is to stretch the star mask. This is quick in comparison. Load your starmask. You’ll probably still be in Linear preview mode but that’s ok. Go straight to “Image Processing / Histogram Transformation” and make a series of small stretches by moving the mid-point left, apply after each. Make sure you have R, G and B channels enabled. After a while you’ll see stars. It’s not too critical that you get it right at this point because you can stretch more or less later in Gimp. Once you see a decent amount of stars, save it as “stars.tif”.
Star Tweaking (Optional)
This step is optional. I like to load my stars into ImagesPlus, select “Special Functions / Star Size, Halo & Shape Reduction”. I’ll then move the sliders half a click to the right to slightly reduce the star size. Once done, save as “stars2.tif” or similar.
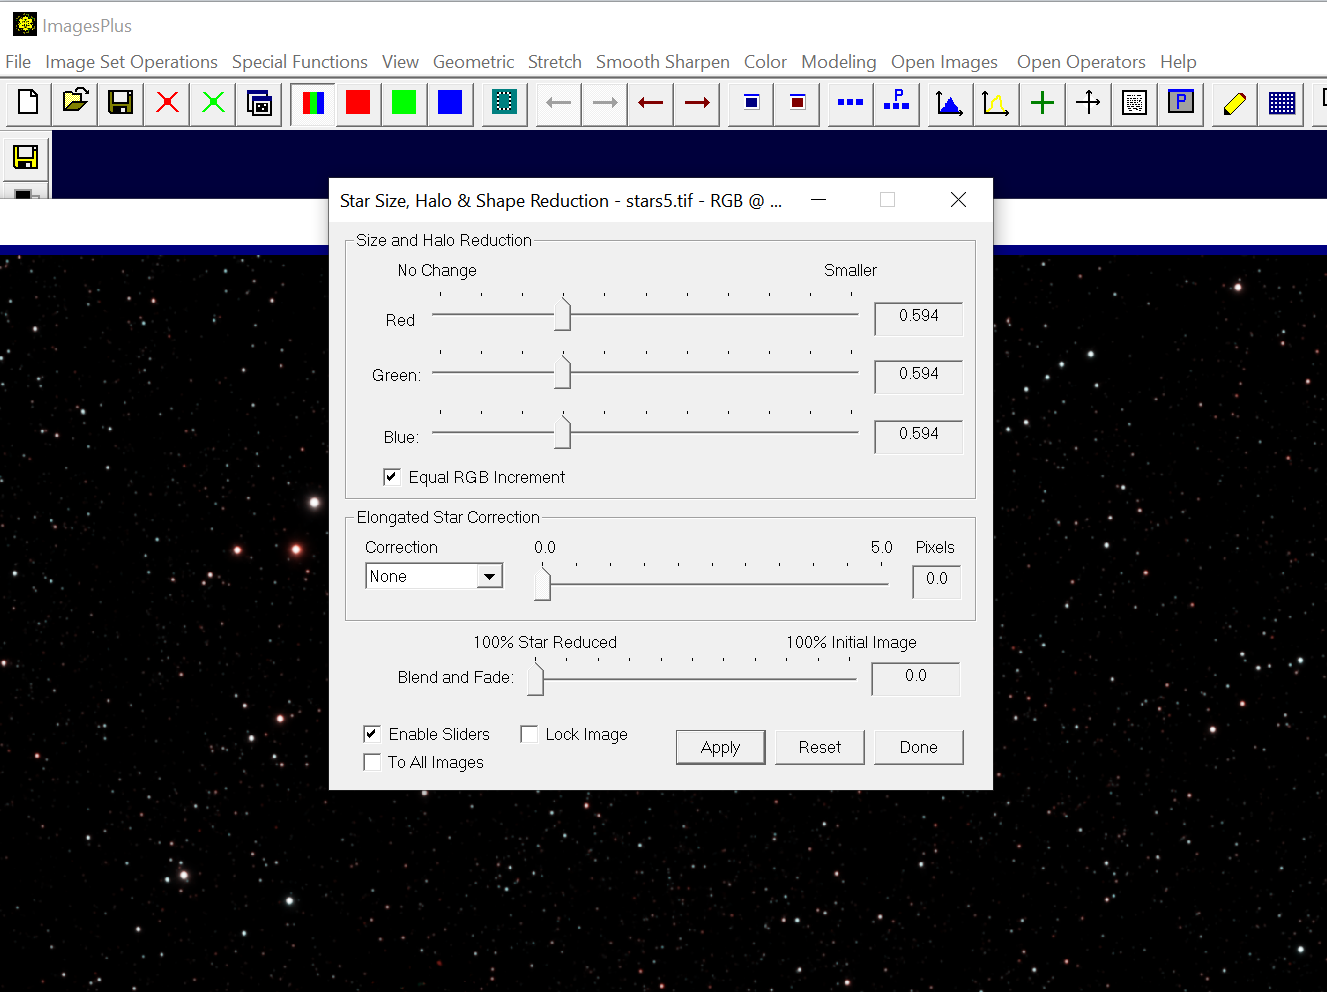
Image Reconstitution with Gimp
Now we have all the pieces we need to reconstitute the image. Now, we can load the background TIF into Gimp and drag in the stars as a layer. Move the layer above the stars and change the blend mode to “screen”. At this point, you should have something similar to what you see in the screenshot below.
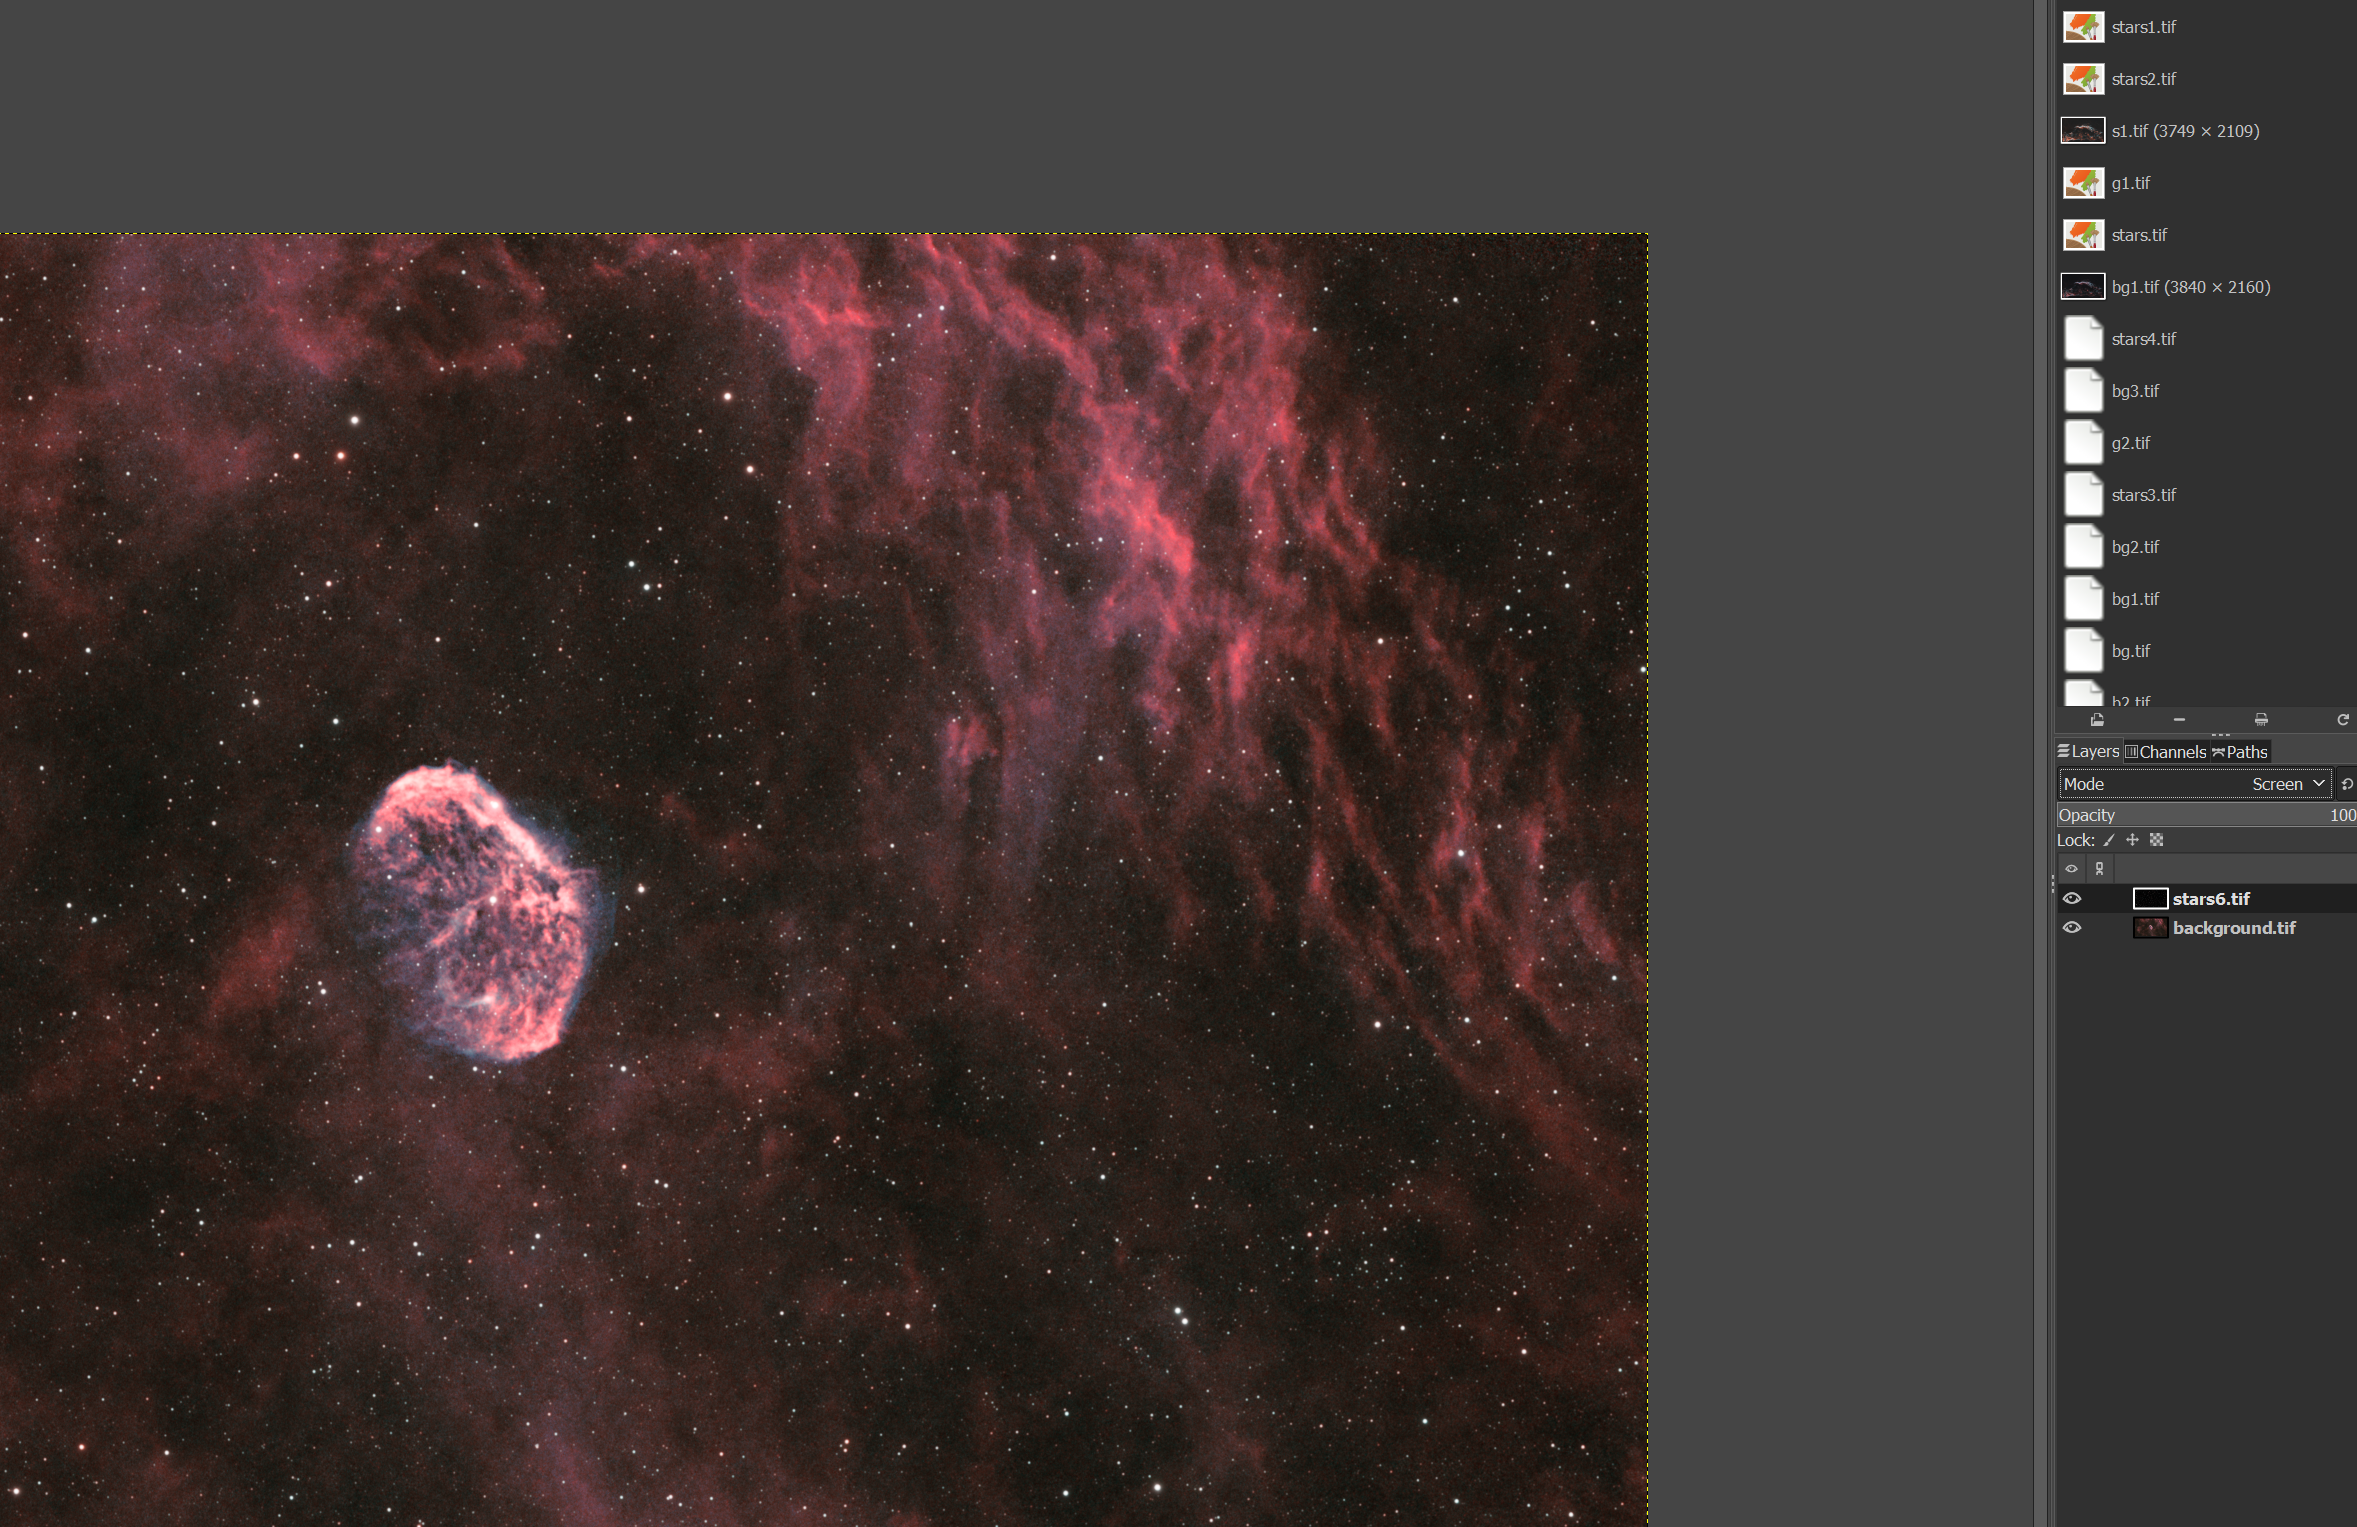
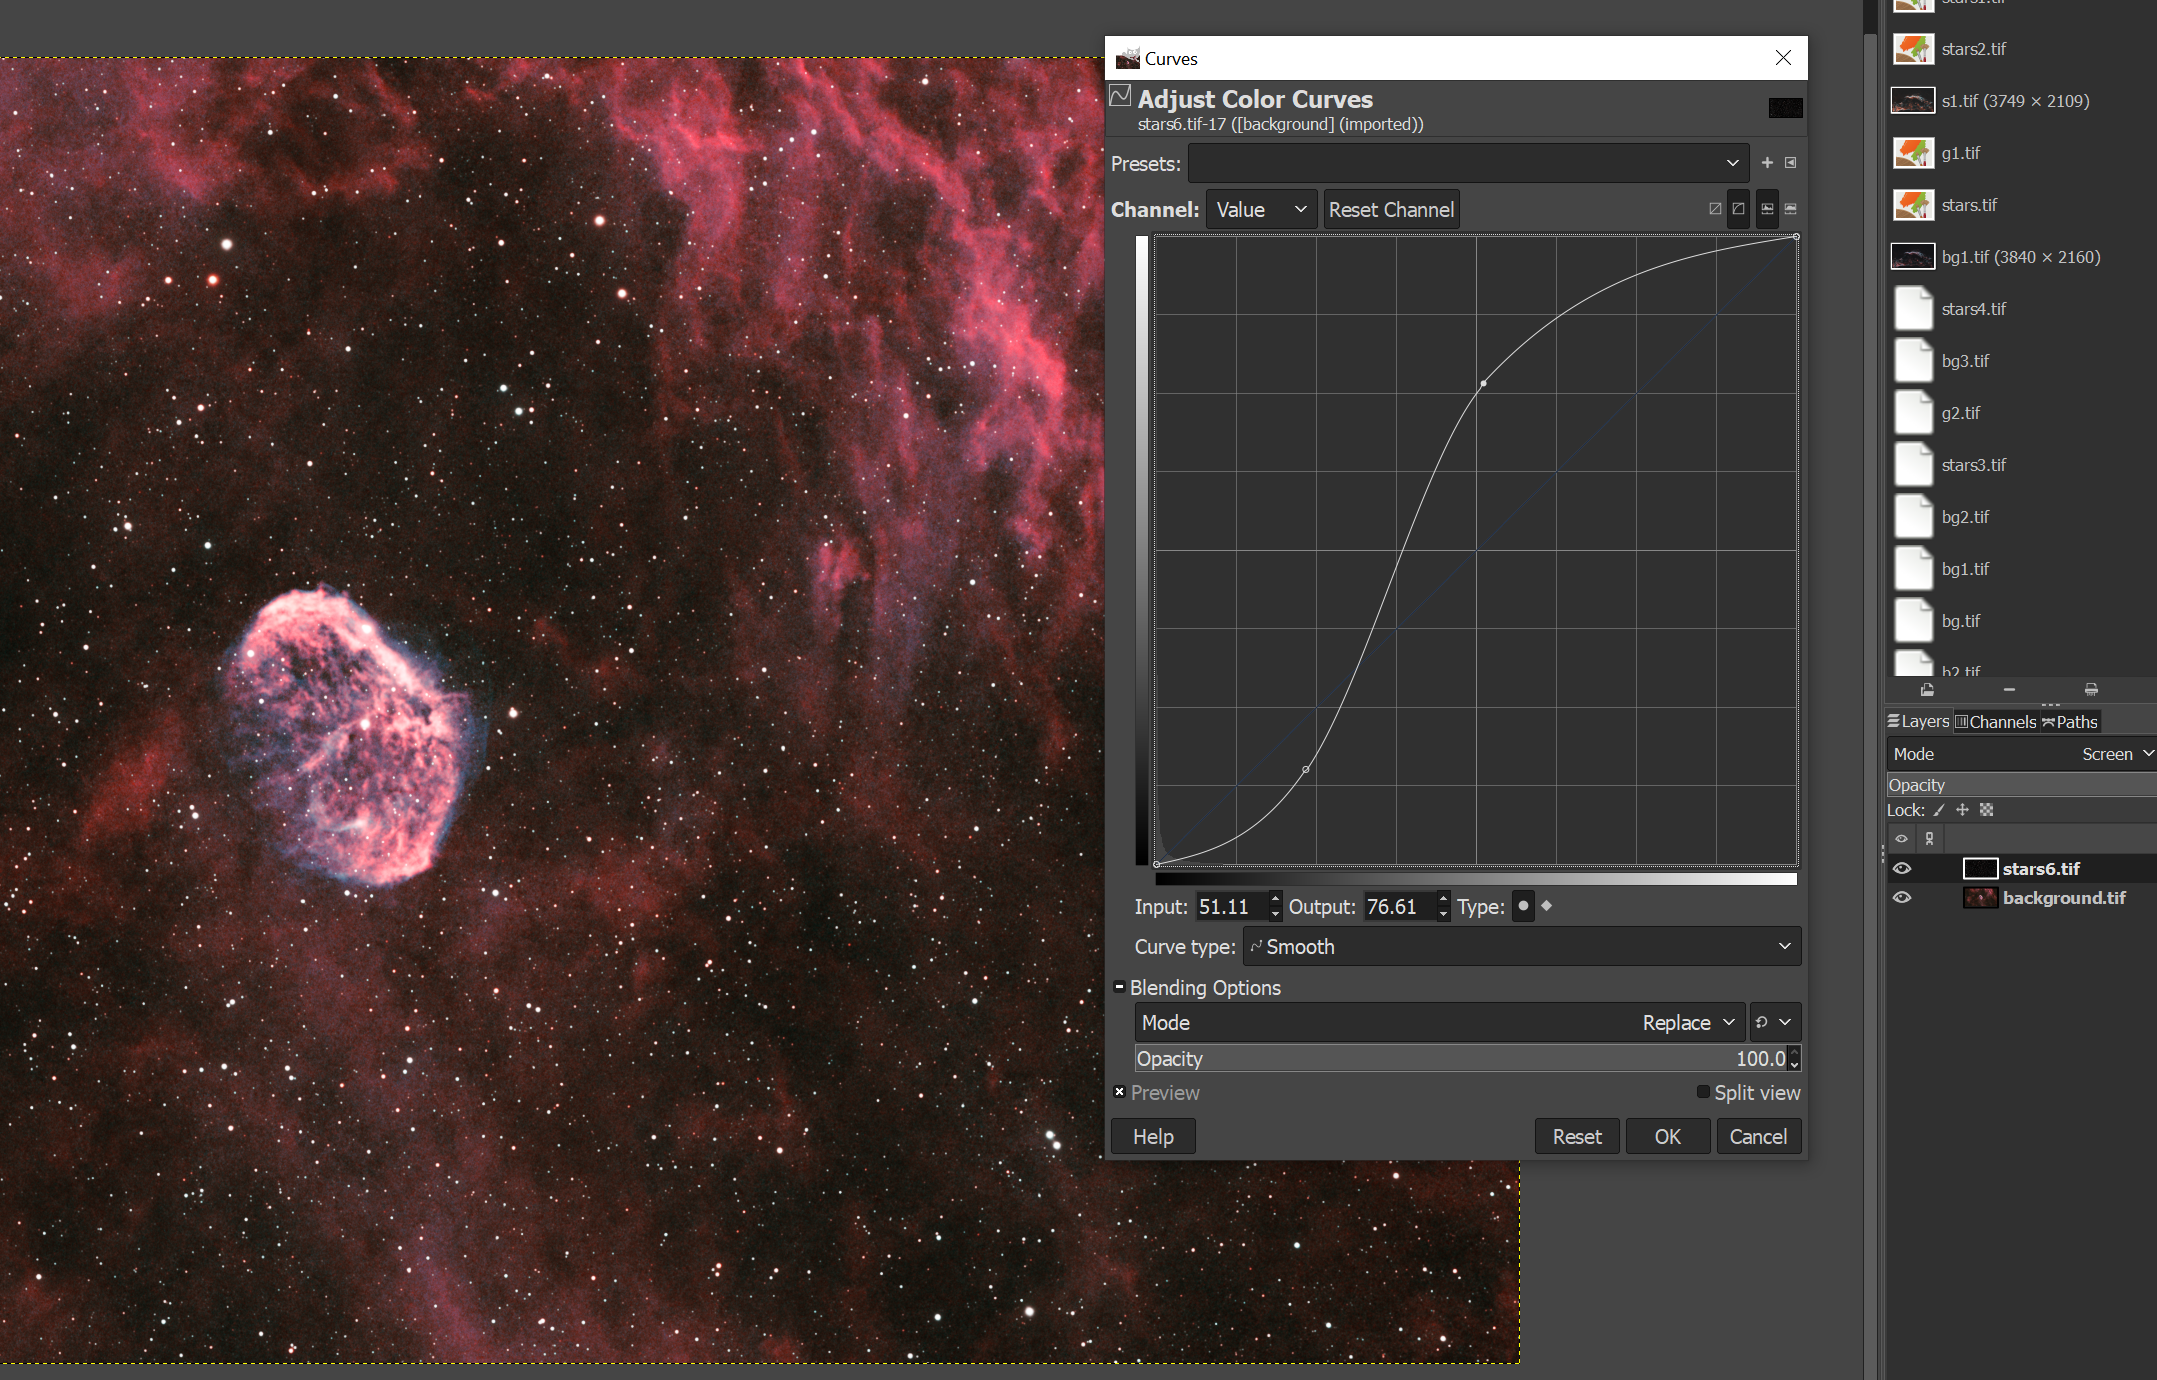
Now you can spend hours letting your artistic talent shine through with curves, hue & saturation tweaks until it looks like you want it. I’m not going to do that for this tutorial but hopefully you get the idea
Once you’re done in Gimp, save the image as a TIF. Remember to turn off layers in the export dialog.
At this point, I like to load back into Siril to do any geometry changes, cropping or last minute stretch tweaks.
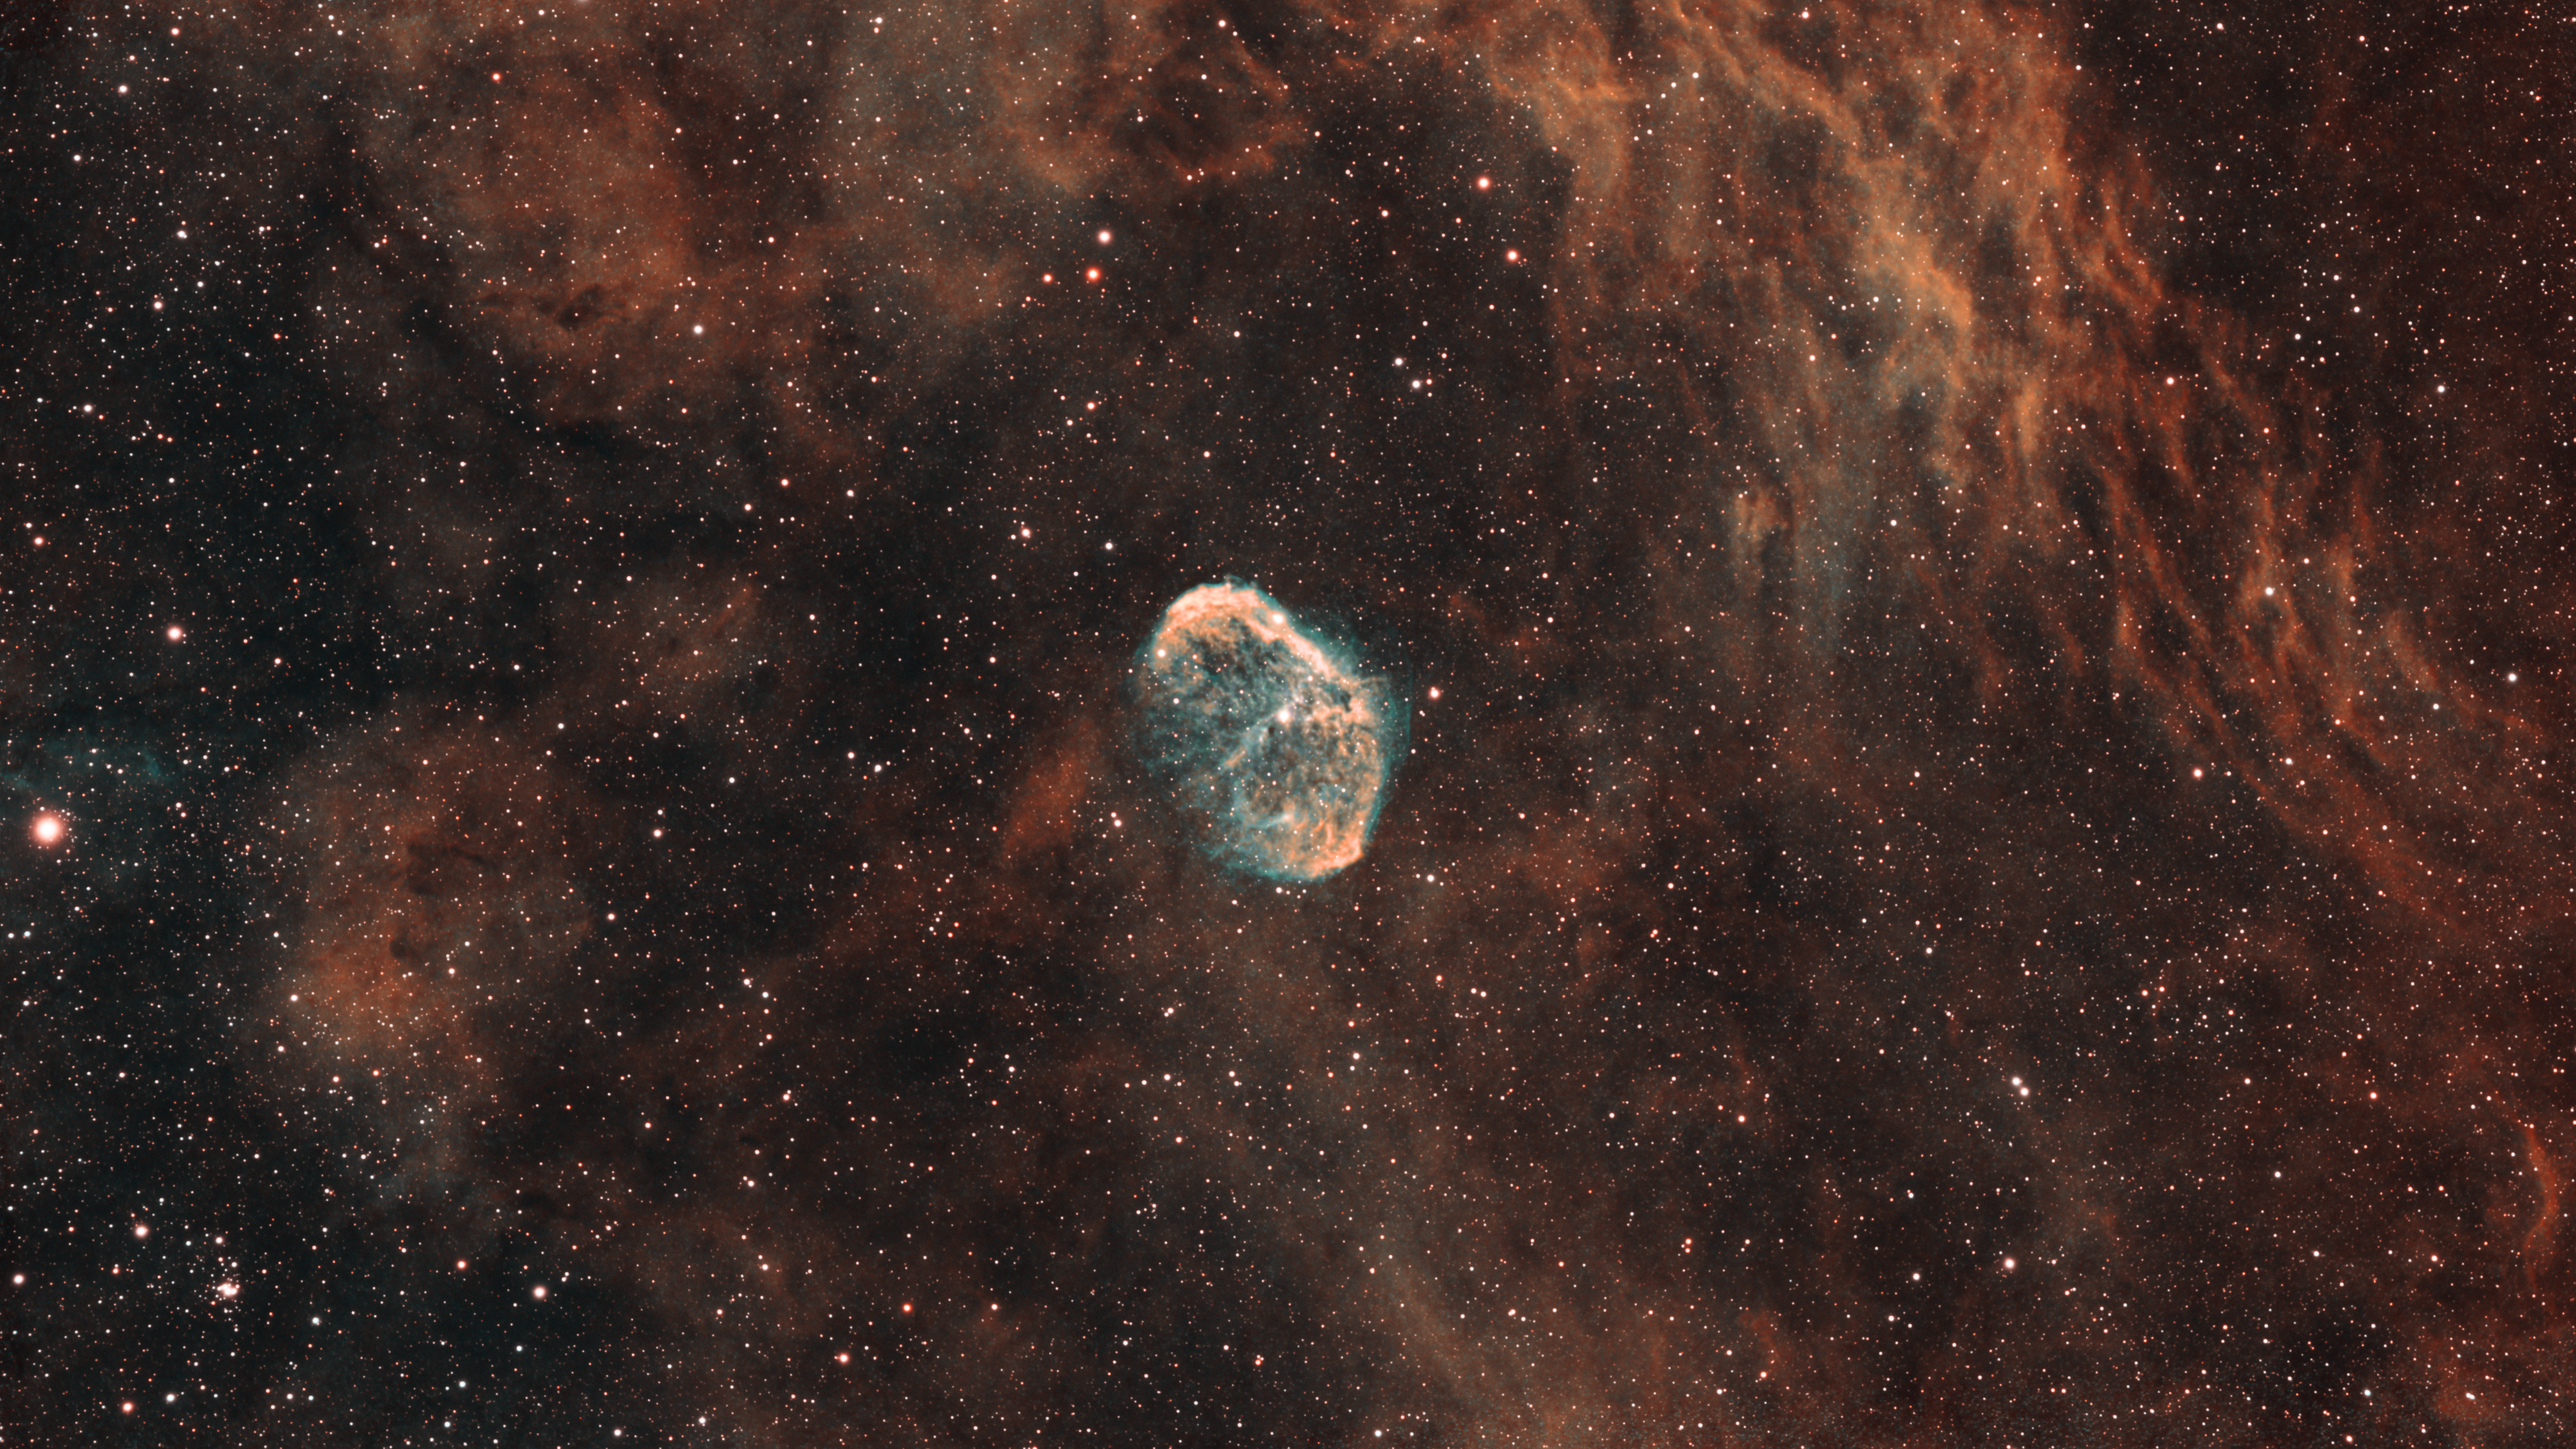
Example Result
The final image I made using these techniques is below. Note, I did this prior to writing this article so the colours are rather different.